


If you want to enable e-commerce on your WordPress site.WooCommerce Undoubtedly the most popular e-commerce plugin in the world. From6senseData.WooCommercetake up 70.04% of e-commerce platform market share, far outpacing competitors (e.g. Shopify's 17.66%). Currently.Over 2.6 million merchants It is being used to override 10 countries/areas, fully proved its reliability and scalability.
![Image [1] - How to Activate WooCommerce Plugin: Full Graphic Tutorial](http://gqxi.cn/wp-content/uploads/2025/05/20250605114337209-image.png)
As a Totally free plugin, WooCommerce offers a complete e-commerce solution for merchants of all sizes, including product management, order processing, payment integration, and other features.
1. What is WooCommerce?
WooCommerce is a WordPress plugin developed by Automattic that turns your website into a complete e-commerce platform. It supports:
- Sales of physical and virtual goods
- Inventory management
- Multiple payment methods (e.g. PayPal, Stripe, Cash on Delivery, etc.)
- Automatic calculation of tax rates, shipping costs and invoices
- Extended multi-language and multi-currency support
- together with Elementor,Astra,Divi Perfect integration of themes such as
2. Install and activate the WooCommerce plug-in.
Step 1: Login to WordPress Backend
Log in to your website's backend using an administrator account at the URL usually:
https://你的域名/wp-admin
Step 2: Go to the plugin installation page
Click on the left navigation bar:
Plugins > Add Plugins
Type in the search box "WooCommerce"You will see the official plugin developed by Automattic.
Step 3: Click "Install Now".
Once you have found the WooCommerce plugin, click on the blue button "Install now."The
Wait a few seconds and the button will change to "Enable".
Step 4: Click "Enable" to activate the plug-in
Click "Enable" and the WooCommerce plugin will be officially activated on your website.
![Image [2] - How to Activate WooCommerce Plugin: Full Graphic Tutorial](http://gqxi.cn/wp-content/uploads/2025/05/20250530163301632-image.png)
3. Setup wizard after first-time activation
WooCommerce automatically launches a setup wizard to help you with the basic configuration of your e-commerce site:
- Store Information: Fill in the store address, country, city and zip code.
- Industry classification: choose the type of goods you carry, such as fashion, beauty, food, etc.
- Commodity Type: Select the type of commodity to be sold (physical, virtual, service, etc.).
- Payment method settings: Enable PayPal,StripeThe payment methods include cash on delivery, cash on delivery, and so on.
- Shipping Options: Set the shipping area and delivery method (can be subsequently adjusted).
- Recommended plug-ins: optional to install such as JetpackThe recommended plugins such as Facebook for WooCommerce.
![Image [3] - How to Activate WooCommerce Plugin: Full Graphic Tutorial](http://gqxi.cn/wp-content/uploads/2025/05/20250530163749477-image.png)
4. Important post-activation configuration recommendations
- Set currency and tax rates:
Go to WooCommerce > Settings > General, select the primary currency and configure tax-related options.
![Image [4] - How to Activate WooCommerce Plugin: Full Graphic Tutorial](http://gqxi.cn/wp-content/uploads/2025/05/20250530164134378-image.png)
- Configure email templates and order notifications:
WooCommerce > Settings > Mail, set the sender information and customize the notification template.
![Image [5] - How to Activate WooCommerce Plugin: Full Graphic Tutorial](http://gqxi.cn/wp-content/uploads/2025/05/20250530164245774-image.png)
- Add product categories and attributes:
Go to the WordPress backend → Products) > Category or Properties to set the filter criteria such as category structure, brand, color, size, etc.
![Image [6] - How to Activate WooCommerce Plugin: Full Graphic Tutorial](http://gqxi.cn/wp-content/uploads/2025/05/20250530164607684-image.png)
5. Next steps after activating WooCommerce
- Install WooCommerce compatible themes (such as Astra,Blocksy(Storefront)
- Designing the home page using page builders (Elementor, Bricks,Gutenberg etc.)
- Add product information, including title, description, price, inventory and images
- Configure shopping cart, checkout page, account page and other necessary pages
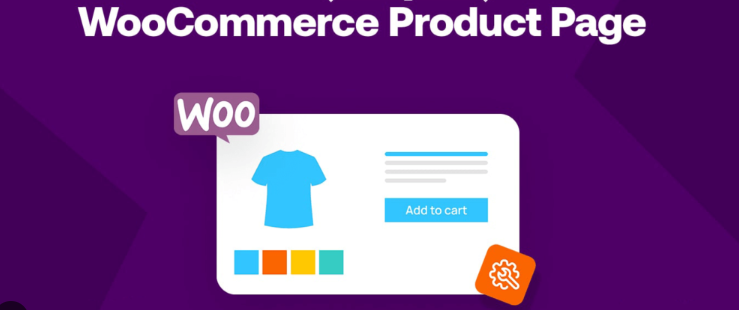
- Optimize product pages and site structure with SEO plugins such as All in One SEO
6. Easily start your e-commerce journey
With the above steps, you have successfully activated the WooCommerce plugin and completed the initial setup. Next, you can focus on adding products, designing pages, and integrating payment and logistics systems to make your online store go live smoothly and continue to grow.

Link to this article:http://gqxi.cn/en/56984The article is copyrighted and must be reproduced with attribution.


![Emoji[jingya]-Photonflux.com | Professional WordPress repair service, worldwide, rapid response](http://gqxi.cn/wp-content/themes/zibll/img/smilies/jingya.gif)


No comments